Showing posts with label China Glaze. Show all posts

Saturday, May 9, 2015

Princess Water Decals

Press Sample

Hi everyone! 
Sorry I haven't been around for the last few weeks. I got a job at a popular coffee chain and I can't wear nail polish for food safety reasons, which makes blogging a lot harder. I'm going to try to post on a more regular schedule, so we will see what I can manage. :)


For today's look I used the QS-017 water decal sheet from Born Pretty Store. This sheet features most of the Disney princesses in one way or another and is super cute! I chose to apply these two decals over China Glaze Petal to the Metal! You can find these decals at Born Pretty Store for $2.65USD, plus use the code YSG10 for 10% off!

What do you think? Let me know below!

Sunday, April 12, 2015

Born Pretty Store Mixed Nail Art Wheel

Press Sample
Hi everyone! 
Today I used one of my all time favorite yellow polishes, along with a really cool 3D flower from Born Pretty Store!


For a completely opaque look, I started off with three thin coats of China Glaze Metro Pollin-Tin! It dries to a matte finish, which I love! 
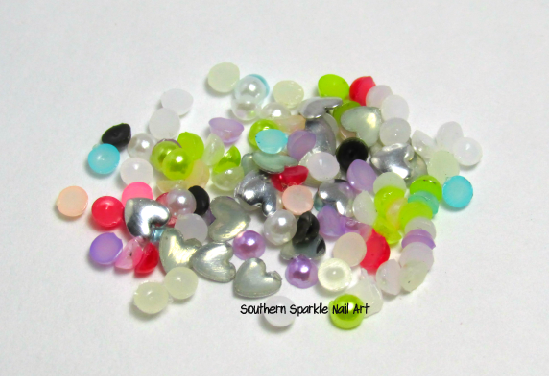
The 3D flower came from a mixed nail art wheel that I ordered from Born Pretty Store. The wheel contains 360 pieces and they range from studs and bows to flowers and fruit. It costs $3.86 USD.
Don't forget to use the code YSG10 for 10% off of your Born Pretty Store purchase!


Tuesday, September 2, 2014

Pineapple Skittle

Hello Lacquer Lovers!
Today I have a super cute pineapple skittle, inspired by elleandish on YouTube.
I think this is the perfect manicure to celebrate the end of the summer!

Thumb & Pinky
I used two coats of China Glaze Metro Pollen-Tin. Then, I added some gold studs to add something a little extra!

Index
I started off with two coats of China Glaze At Vase Value. Then, I added three white stripes using L.A. Colors Art Deco White Striper and added a gold stud.

Middle
I started off with two coats of Wet n Wild French White Creme. Then taking China Glaze Metro Pollen-Tin I drew an oval. I used L.A. Colors Art Deco Stripers in Bright Green and Bright Orange to add the pineapple's characteristics. The pineapple is a little off center, but practice makes perfect. :)

Ring
I started off with two coats of China Glaze At Vase Value and I topped it off with one thick coat of a Sally Hansen Gem Crush in Bling-Tastic.

What do you think? Have you ever thought about rocking fruit as a mani?

Wednesday, July 16, 2014

Pink Bows

* The following products were sent to me for my honest review. For more information, please visit my disclosure policy.*

Hello Lacquer Lovers! 
Today I have a subtle and simple nail art look, using the N.NAIL QA29 Stamping Plate from KKCenterHK. 


I started the manicure off with two coats of Zoya Rue, which is a subtle blush color. Then, using Sally Hansen Pink Punk and the QA29 plate, I stamped on one of the bow patterns all over my nails.  I topped the look off with China Glaze Fairy Dust to give it an extra sparkle. 


The stamping plate is sold on KKCenterHK's website for $3.00USD. As there are many cute bow designs on the plate, I'm sure it will show up in furture posts.

Do you have any stamping advice? Let me know in the comments below!

Wednesday, June 11, 2014

Lilac Tribal

Hello Lacquer Lovers!
Today I have a lilac tribal look, inspired by a nail art look I found on chantellevermont.com.


For this look, I used two even coats of Sinful Colors Sinful Shine in Pragmatic. It is a gorgeous lilac with a slight shimmer.
Then, I used L.A. Colors nail art stripers in Black and White to create the tribal patterns. 
After it dried I used China Glaze Fairy Dust to bring it all together and top coated.


I'm really loving the tribal look this summer! 
What look are you loving right now? Let me know in the comments! :)

Wednesday, May 28, 2014

Twin Nails: Birds of Paradise

Hello Lacquer Lovers!
Today I have a twin mani with Sarah from Partly Cloudy with a Chance of Lacquer! Our theme was "birds of paradise" flowers. Let me tell y'all, this was a super hard challenge and this is what I came up with after many failed manicures.


Polishes Used:
Essie Stylenomics
China Glaze Fairy Dust
China Glaze Metro Pollen-tin
China Glaze Petal to the Metal
Wet n Wild French White Creme


Make sure to hop on over to Sarah's blog to see what she created! :)
See y'all on Friday!


Sunday, February 16, 2014

kkcenterhk Review: Heart Studs & Candy Studs

 * The following products were sent to me for my honest review. For more information, please visit my disclosure policy.*

Hello Lacquer Lovers! 
Today I have two more products to show you from kkcenterhk
For this look I used two coats of an unlabeled Color Club and one coat of China Glaze Fairy Dust.
On my accent nail I have both N.NAIL DRN784, which are the hearts, and N.NAIL DRN808, which are the candy colored studs. 
The heart studs were the perfect size for my nails and the candy colored studs were too! 
I applied them on top of the wet China Glaze Fairy Dust, waited until it dried, and then applied top coat.
 I tested this look out and found that the studs have awesome staying power if applied correctly! I ended up picking them off about three days in, but I'm sure they would have lasted a lot longer!
Overall I really loved these studs! I'm sure y'all will see these in many more posts to come!


Sunday, December 29, 2013

Galaxy Nails!

Hello Lacquer Lovers!
The universe is a beautiful thing; I, for one, believe that it is one piece of art! Today this nail art look is inspired by the galaxies!


I used Essie Aruba Blue as my base color. Then I took Above the Curve Risen Angel, Too Cute-icle Beach Blanket, Cutoffs and Bikini, and Orly Oh Cabana Boy and painted them on lightly in different locations on the nail. I used China Glaze Fairy Dust to blend the colors together. To finish up the look I used FingerPaints Santa's Magic in different locations.

This look is very easy to recreate and is the perfect place to start if you're just getting into nail art or if you are a seasoned pro! :)


Wednesday, July 3, 2013

Independence Day!

Hello Lacquer Lovers!
Happy Independence Day to all of my US ladies!

Today's post will be super quick, but it is a momentous occasion! My right hand turned out better nail art wise than my left, which never happens!


On my pinkie I used two coats of L.A. Colors BCC566, which is a navy shimmer. I applied one coat of Orly Spazmatic over it. It is the perfect navy combo!
On my ring finger I started off with two coats of Wet n Wild French White Creme. I then applied one coat L.A. Colors Art Deco Nail Art Striper in Red Glitter. It has more of a pink pay off, so I suggest two coats. Next to Red Glitter I applied one coat of L.A. Colors Art Deco Nail Art Striper in Blue Glitter. I wish they had more original names!
My middle finger has two coats of OPI Red My Fortune Cookie, which is my go to red! Using L.A. Colors Nail Art Striper in Silver I drew an anchor. A tutorial will be up on that soon!
Again I used two coats of OPI Red My Fortune Cookie on my index finger. I layered one coat of China Glaze Ring in the Red over it.
On my thumb I have two coats of Jindie-PENDENCE over Wet N Wild White French Creme. You can find a full review HERE
As always I started off with a base coat and topped it off with top coat!

Don't forget about my GIVEAWAY!
See you in a few days!

Wednesday, April 24, 2013

Neon Skittles!

First off, I'd like to say that I am sorry I haven't blogged in a while. The stresses of school, with exams coming up in a few weeks, got to me and a few bad breaks on swatching hand have prevented me from blogging for the past three weeks. I'm back and better than ever!

Today I have 5 Color Club neons and China Glaze Whirled Away! Read more after the jump! :]


Friday, March 15, 2013

Happy St. Patrick's Day!

Happy St. Patrick's Day everyone!
 For my St. Patty's manicure I went with a watercolor look using the saran wrap method. To see how I achieved this look, click read more! :]


For this watercolor manicure I used the following products:
 -Saran Wrap
 -Base Coat
 -Top Coat 
 -At least 2 different green polishes
 -Glitter Topper (optional)

Sunday, January 27, 2013

Leopard Print


This is my last post that I am integrating from Facebook! How exciting! This is a nail art post in which I absolutely adore! Find out more after the jump!

China Glaze 'Whirled Away'

Once again here is another post I'm integrating from Facebook

Check out the review after the jump!

Saturday, January 26, 2013

China Glaze 'With Love' & 'Make a Spectacle'

   Here is an oldie, but a goodie, from Facebook!


Jan. 5, 2012

As you can see from the picture below China Glaze With Love is a gorgeous red color. It was easy to apply and was opaque in two thin coats. The dry time was definitely something I want to see from other nail polishes. Each coat was dry in about four minutes flat, which is impressive considering it was not a fast dry nail polish. I was not as happy with China Glaze Make A Spectacle. In the bottle Make A Spectacle seems like a white glitter topcoat with a few silver tinted glitter. As I applied it on the nail I found that it really is not what it seems. Make A Spectacle layered over With Love left me with a gold accent nail, which is not what I intended. At first I thought it may have been my lighting, but after using many different lights, it still came out as a gold finish. This manicure, in my opinion, would be good for either before the holidays or sometime there after. To me it just doesn't look right for January. I plan on wearing this color combo again, but I think I will wait until the holiday season comes around again.


Enchanted Polish 'Finger Lickin' Good' & China Glaze 'Roguish Red'


    This was my first ever review on my Facebook page. There is only one picture this time, but trust me, the pictures tend to multiply in my future posts!


Dec. 29, 2012

   These two polishes are like soul mates. They mesh well together. I was very impressed with China Glaze. Their polish had a good dry time and was very opaque. Here I used two coats. I was not as impressed with Enchanted Polish. The formula to "Finger Lickin' Good" seemed very thick and needed more dry time than usual. Here I used two coats. Besides that "Finger Lickin' Good" is a beautiful polish packed with glitter! This combo is perfect for the end of summer or beginning of fall.


   I will be back tomorrow with another review! Enjoy!